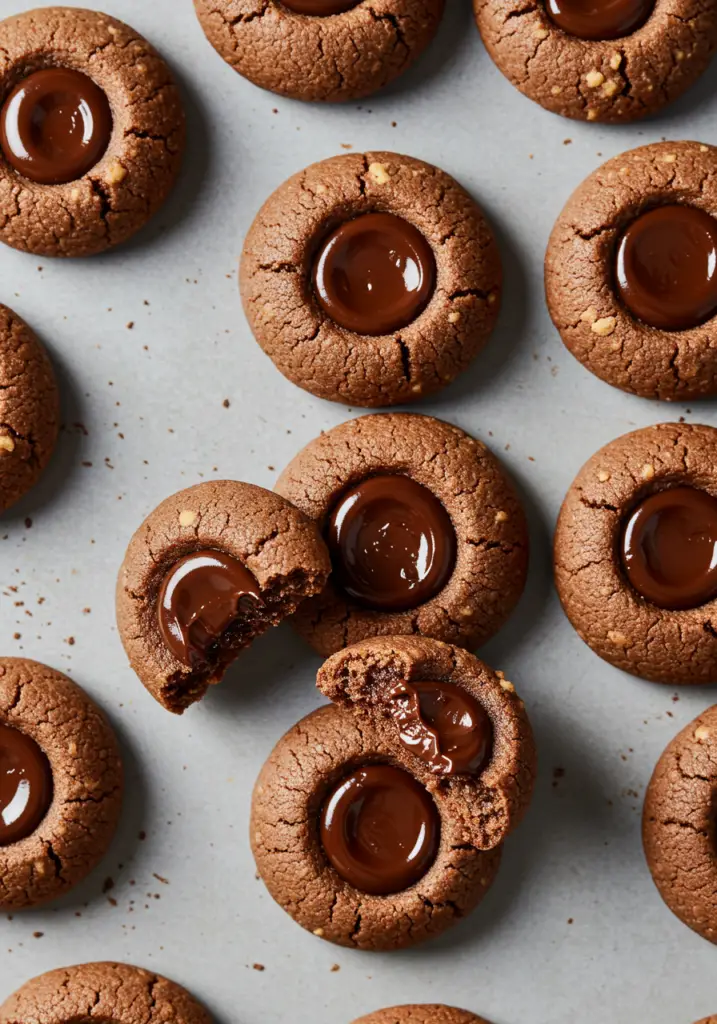
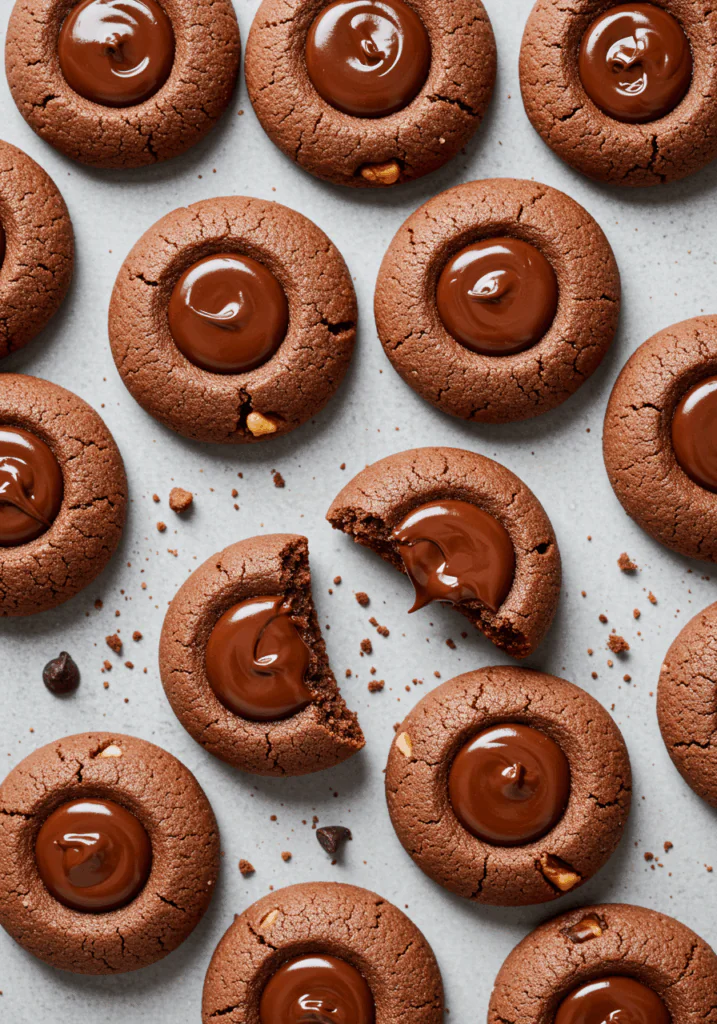
If you’re craving a cookie that’s buttery, nutty, and filled with rich chocolate goodness, these Chocolate Hazelnut Thumbprint Cookies are a must-try! With a soft, melt-in-your-mouth texture and a luscious chocolate hazelnut center, they’re perfect for holiday trays, special occasions, or just a cozy afternoon treat.
Want recipes like this delivered straight to your inbox? Subscribe now to get the latest culinary creations you’ll love.
Why You’ll Love This Recipe
Soft and Buttery – A tender cookie that practically melts in your mouth.
Rich Chocolate Center – Filled with creamy chocolate hazelnut spread.
Simple to Make – Easy, classic thumbprint cookie method.
Perfect for Holidays – Gorgeous on cookie trays and perfect for gifting.
Customizable – Roll in chopped hazelnuts or drizzle with extra chocolate.
Ingredients You’ll Need
For the Cookies:
1 cup unsalted butter, softened
½ cup granulated sugar
2 large egg yolks
1 tsp vanilla extract
2 cups all-purpose flour
¼ tsp salt
For the Filling:
½ cup chocolate hazelnut spread (like Nutella)
Optional Garnish:
½ cup finely chopped hazelnuts (for rolling)
Powdered sugar for dusting
Tools You’ll Need
Mixing bowls
Electric hand mixer or stand mixer
Measuring cups and spoons
Baking sheets
Parchment paper or silicone baking mat
Small spoon
Step-by-Step Instructions
Step 1: Preheat the Oven
Preheat your oven to 350°F (175°C).
Line two baking sheets with parchment paper or silicone baking mats.
Step 2: Cream the Butter and Sugar
In a large bowl, beat the softened butter and sugar together with an electric mixer on medium speed until light and fluffy, about 2–3 minutes.
Step 3: Add Egg Yolks and Vanilla
Beat in the egg yolks and vanilla extract until combined.
Step 4: Add Dry Ingredients
Gradually add the flour and salt, mixing on low speed until a soft dough forms.
If the dough feels too sticky, chill it for 15 minutes.
Step 5: Shape the Cookies
Scoop about 1 tablespoon of dough and roll it into a ball.
(Optional: Roll each ball in chopped hazelnuts for extra crunch.)
Place the dough balls 2 inches apart on the prepared baking sheets.
Step 6: Make the Thumbprints
Use your thumb or the back of a small spoon to gently press an indentation into the center of each ball.
Step 7: Bake
Bake in the preheated oven for 10–12 minutes, until the edges are just starting to turn golden.
If the indentations puff up, gently press them down again with a spoon immediately after baking.
Step 8: Fill with Chocolate Hazelnut Spread
Allow the cookies to cool slightly, then spoon about ½ teaspoon of chocolate hazelnut spread into each indentation.
Step 9: Cool and Serve
Let the cookies cool completely on a wire rack.
Dust with powdered sugar if desired and enjoy!
Tips for Perfect Thumbprint Cookies
Chill Dough If Needed – Slightly chilled dough holds its shape better.
Don’t Overbake – The cookies should stay soft, so watch closely after 10 minutes.
Press Gently – Create a deep enough indentation without cracking the sides.
Fill After Baking – Adding the chocolate spread after baking keeps it smooth and glossy.
Serving Suggestions
Holiday Cookie Platters – These beauties steal the show on festive trays.
Afternoon Tea – Perfect with a cup of coffee, tea, or hot cocoa.
Gift Boxes – Pack in pretty tins or bags for a thoughtful homemade gift.
Dessert Boards – Pair with other mini treats like truffles and candies.
How to Store & Freeze
Storing:
Room Temperature: Store in an airtight container for up to 5 days.
Refrigerate: For longer freshness, refrigerate for up to 7 days.
Freezing:
Freeze the unfilled baked cookies for up to 2 months. Thaw and fill before serving for best texture and appearance.
Frequently Asked Questions
1. Can I use a different filling?
Yes! Try jam, peanut butter, caramel sauce, or your favorite spread.
2. Can I make these gluten-free?
Yes, substitute with a 1:1 gluten-free baking flour blend.
3. Why did my cookies crack?
A few small cracks are normal. If cracking is excessive, the dough may be too dry; add a teaspoon of milk if needed.
4. Can I freeze the dough?
Absolutely! Freeze rolled dough balls and bake straight from frozen, adding 1–2 extra minutes to the bake time.
Final Thoughts
These Chocolate Hazelnut Thumbprint Cookies are rich, buttery, and filled with sweet chocolatey bliss. They’re easy enough for everyday baking but special enough to wow on any occasion. Whether you’re sharing them or savoring them yourself, they’re bound to become a new favorite!
Give them a try and let me know how they turn out! Don’t forget to leave a review and share your beautiful cookies on Pinterest and Instagram. I can’t wait to see your creations!
Preparation Time: 15 minutes
Cooking Time: 12 minutes
Cuisine: American
Nutritional Information (Per Cookie):
Calories: 140 | Protein: 2g | Carbohydrates: 14g | Fat: 9g | Fiber: 0g | Sodium: 50mg

Chocolate Hazelnut Thumbprint Cookies
- Total Time: 27 minutes
Description
If you’re craving a cookie that’s buttery, nutty, and filled with rich chocolate goodness, these Chocolate Hazelnut Thumbprint Cookies are a must-try! With a soft, melt-in-your-mouth texture and a luscious chocolate hazelnut center, they’re perfect for holiday trays, special occasions, or just a cozy afternoon treat.
Want recipes like this delivered straight to your inbox? Subscribe now to get the latest culinary creations you’ll love.
Ingredients
For the Cookies:
1 cup unsalted butter, softened
½ cup granulated sugar
2 large egg yolks
1 tsp vanilla extract
2 cups all-purpose flour
¼ tsp salt
For the Filling:
½ cup chocolate hazelnut spread (like Nutella)
Optional Garnish:
½ cup finely chopped hazelnuts (for rolling)
Powdered sugar for dusting
Instructions
Step 1: Preheat the Oven
Preheat your oven to 350°F (175°C).
Line two baking sheets with parchment paper or silicone baking mats.
Step 2: Cream the Butter and Sugar
In a large bowl, beat the softened butter and sugar together with an electric mixer on medium speed until light and fluffy, about 2–3 minutes.
Step 3: Add Egg Yolks and Vanilla
Beat in the egg yolks and vanilla extract until combined.
Step 4: Add Dry Ingredients
Gradually add the flour and salt, mixing on low speed until a soft dough forms.
If the dough feels too sticky, chill it for 15 minutes.
Step 5: Shape the Cookies
Scoop about 1 tablespoon of dough and roll it into a ball.
(Optional: Roll each ball in chopped hazelnuts for extra crunch.)
Place the dough balls 2 inches apart on the prepared baking sheets.
Step 6: Make the Thumbprints
Use your thumb or the back of a small spoon to gently press an indentation into the center of each ball.
Step 7: Bake
Bake in the preheated oven for 10–12 minutes, until the edges are just starting to turn golden.
If the indentations puff up, gently press them down again with a spoon immediately after baking.
Step 8: Fill with Chocolate Hazelnut Spread
Allow the cookies to cool slightly, then spoon about ½ teaspoon of chocolate hazelnut spread into each indentation.
Step 9: Cool and Serve
Let the cookies cool completely on a wire rack.
Dust with powdered sugar if desired and enjoy!
Notes
Chill Dough If Needed – Slightly chilled dough holds its shape better.
Don’t Overbake – The cookies should stay soft, so watch closely after 10 minutes.
Press Gently – Create a deep enough indentation without cracking the sides.
Fill After Baking – Adding the chocolate spread after baking keeps it smooth and glossy.
- Prep Time: 15 minutes
- Cook Time: 12 minutes
- Cuisine: American