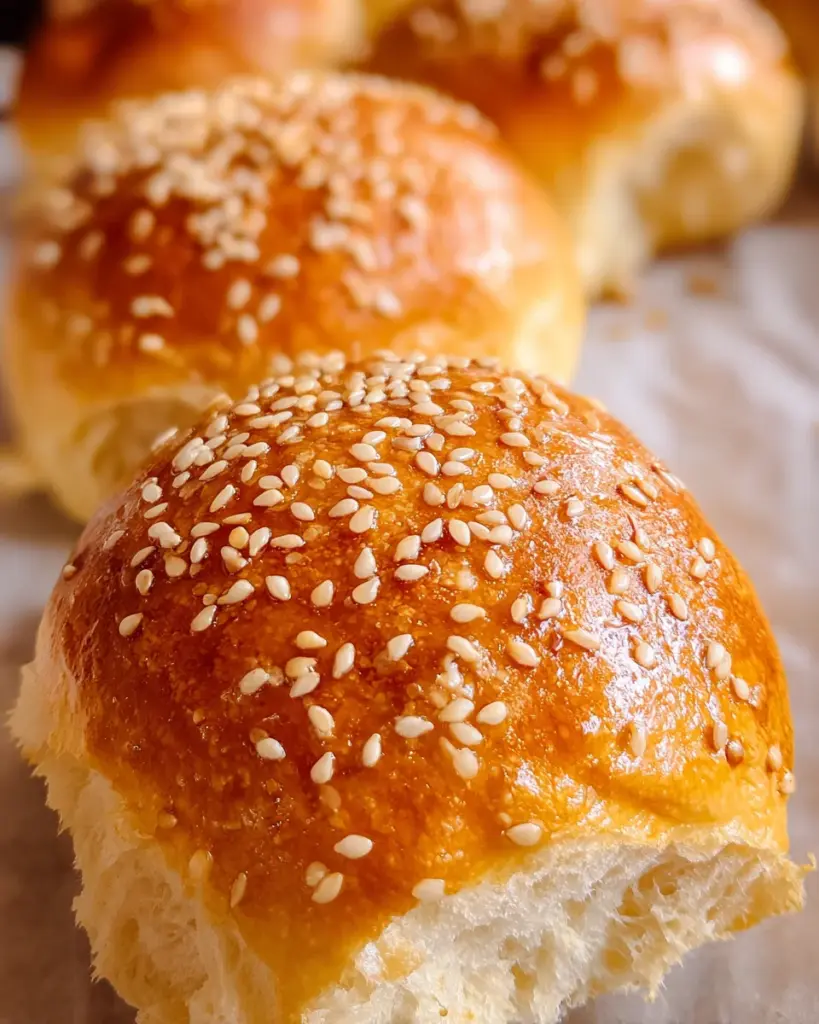
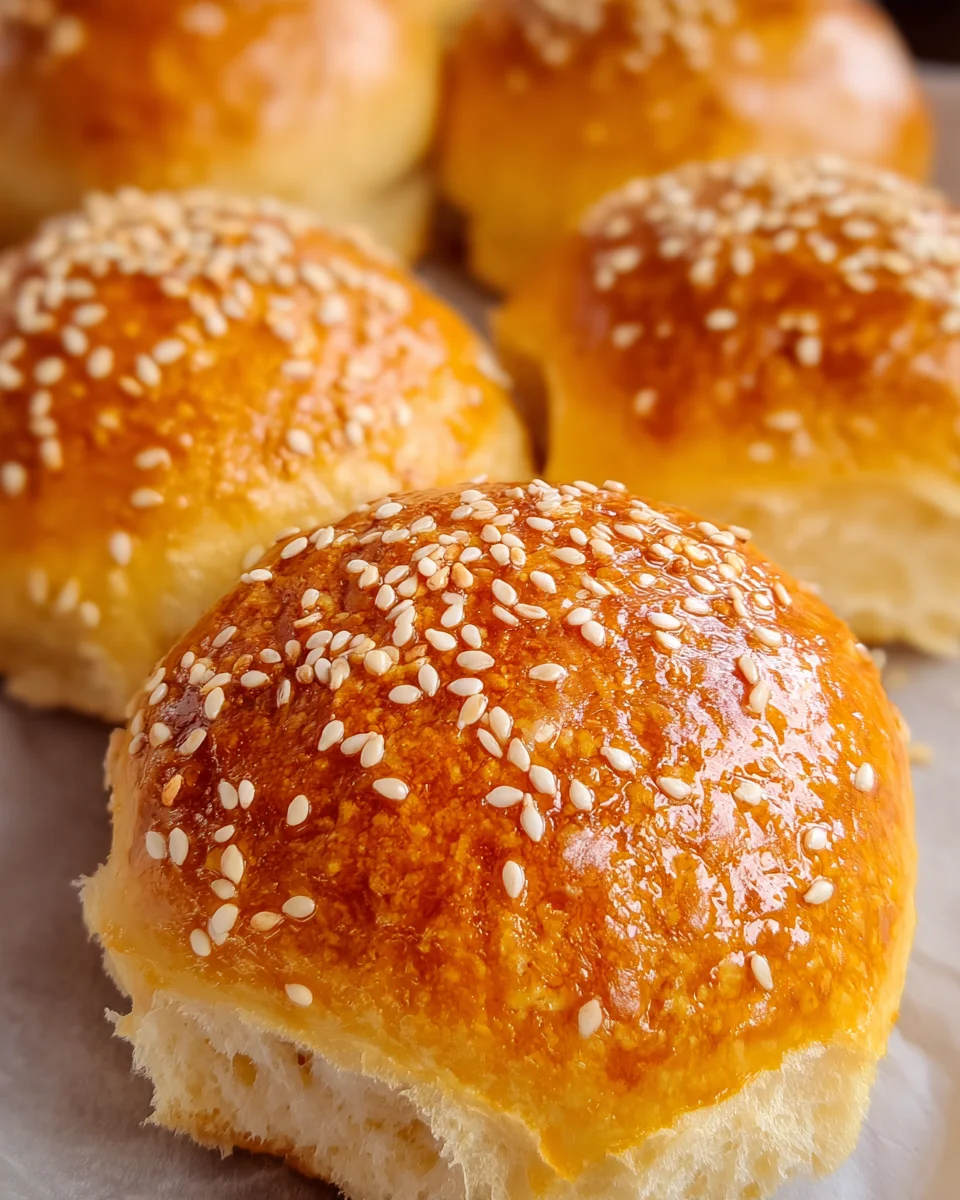
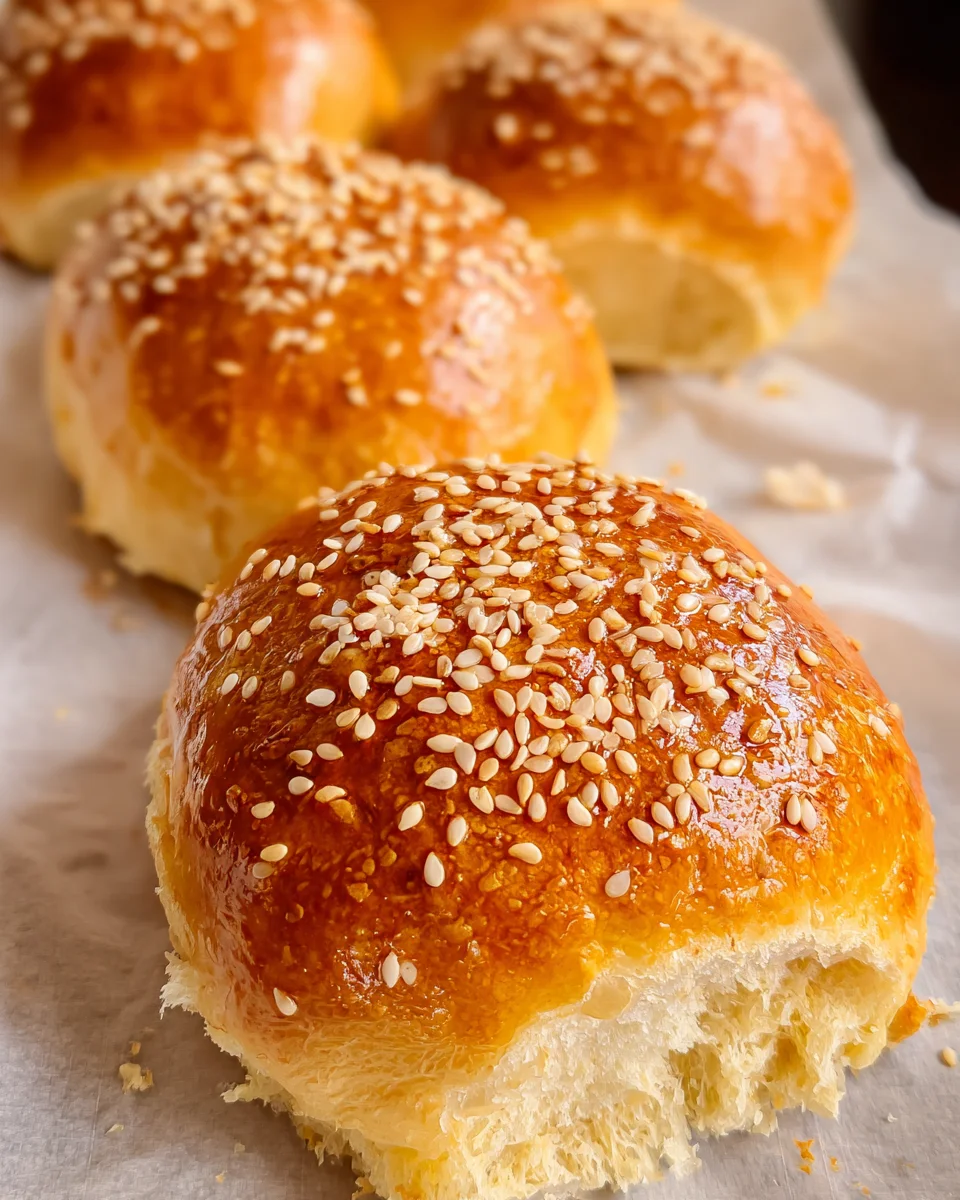
Homemade Slider Buns are the perfect addition to any meal, providing a soft and fluffy base for your favorite fillings. These delightful buns are beginner-friendly and can be used for everything from weeknight dinners to game day spreads. Their golden color and inviting aroma will elevate any gathering, making them a standout feature on your table.
Why You’ll Love This Recipe
- Easy to Make: With simple ingredients and straightforward instructions, you can whip up these slider buns even if you’re a novice baker.
- Versatile: Perfect for sliders, mini sandwiches, or as a side with soups and salads, these buns fit any occasion.
- Fresh from the Oven: There’s nothing quite like the taste of homemade bread, and these buns deliver that bakery-quality flavor right at home.
- Customizable Toppings: Feel free to get creative with toppings—try adding poppy seeds or garlic powder for an extra flavor boost.
Tools and Preparation
Before you start baking, gather your kitchen tools to ensure a smooth process. Having the right equipment makes all the difference when making Homemade Slider Buns.
Essential Kitchen Tools
- Mixing bowl
- Measuring cups and spoons
- Dough whisk or wooden spoon
- Plastic wrap or damp towel
- Baking pan
- Parchment paper
Why These Tools Matter
- Mixing bowl: A large mixing bowl is essential for combining ingredients and allowing the dough to rise properly.
- Measuring cups and spoons: Accurate measurements are critical in baking; these tools ensure your ingredients are just right.
- Dough whisk or wooden spoon: These tools make mixing easier, helping to incorporate all ingredients thoroughly without overworking the dough.
Ingredients
Soft, golden slider buns baked from scratch. Beginner-friendly and bakery-quality, these are perfect for weeknight sliders or game day spreads.
For the Dough
- 3½ cups (420 g) all-purpose flour
- 2¼ tsps (1 packet / 7 g) RapidRise yeast (granulated)
- 2 tbsps (25 g) granulated sugar
- 1 tsp (6 g) table salt (or ¾ tsp / 4 g if using salted butter)
- 1 cup (240 ml) warm water (100–110°F / 38–43°C)
- 2 large (50 g each) eggs (room temperature, divided)
- 3 tbsps (42 g) unsalted butter (softened)
For Topping
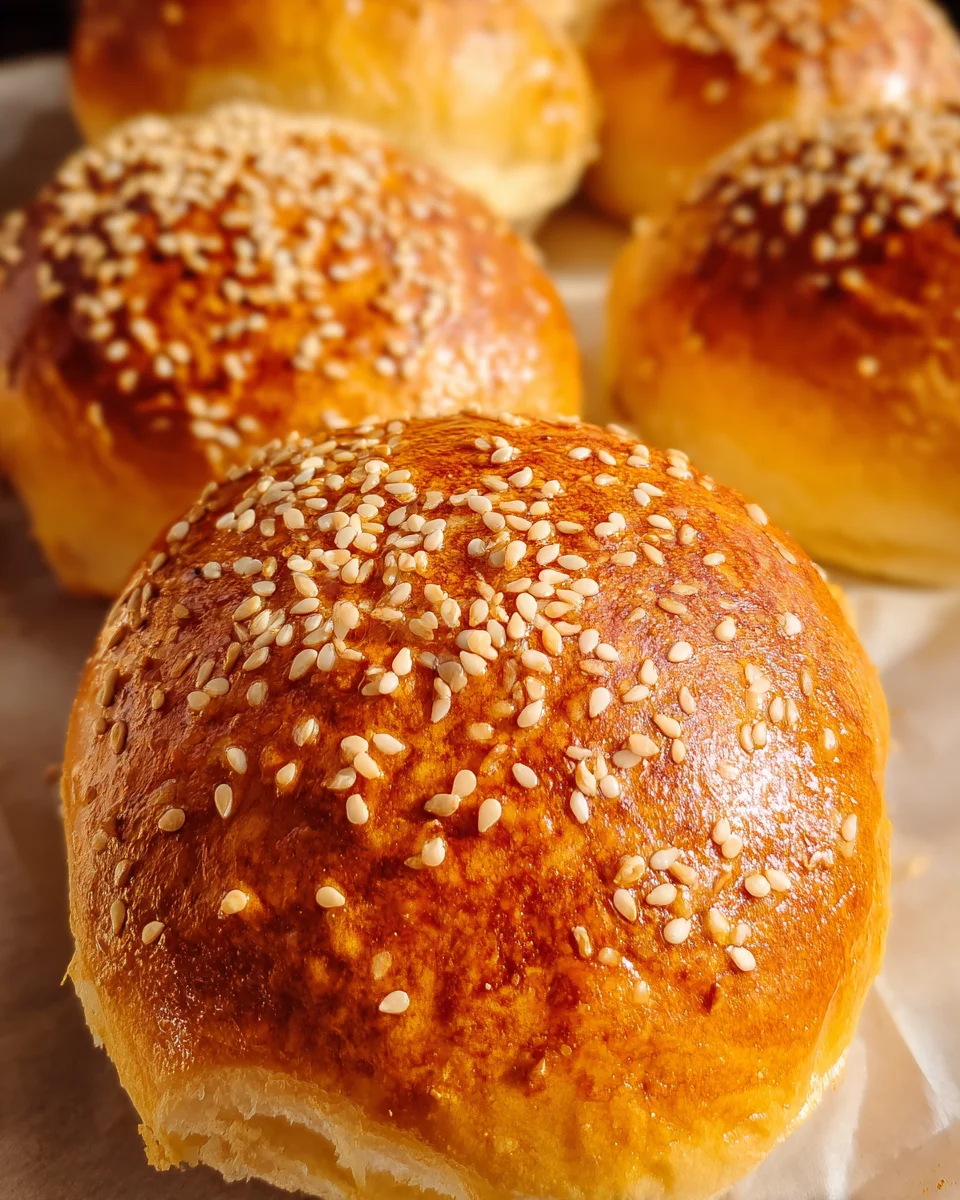
- Sesame seeds
How to Make Homemade Slider Buns
Step 1: Combine Dry Ingredients
In a large bowl, combine the flour, yeast, sugar, and salt. This mixture forms the foundation of your dough.
Step 2: Add Wet Ingredients
Pour in the warm water (100–110°F / 38–43°C) and one egg. Mix until a shaggy dough forms.
Step 3: Knead the Dough
Add the softened butter to the mixture. Knead until the dough is smooth and stretchy. This should take about 8–10 minutes if using a mixer or 10–12 minutes by hand. Remember:
* If sticky, add flour one tablespoon at a time.
* If too dry, add water one tablespoon at a time.
Step 4: First Rise
Cover the bowl with plastic wrap or a damp towel. Let it rise in a warm spot until doubled in size—this takes about 1 to 1½ hours.
Step 5: Shape the Buns
Once risen, punch down the dough gently. Divide it into eight equal pieces. Flatten each piece slightly, tuck edges underneath, and roll into balls. Place on a parchment-lined baking pan with space between them.
Step 6: Second Rise
Cover loosely again and let rise until puffy—about 45 to 60 minutes.
Step 7: Prepare for Baking
Whisk the second egg with one tablespoon of water. Brush this mixture over the tops of each bun and sprinkle generously with sesame seeds.
Step 8: Bake
Preheat your oven to 375°F (190°C). Bake for 18–22 minutes until golden brown and glossy. Allow cooling for about ten minutes before serving.
Enjoy your delicious Homemade Slider Buns!
How to Serve Homemade Slider Buns
Homemade slider buns are versatile and can be served in numerous delicious ways. Whether for a casual family dinner or a fun gathering, these soft buns will elevate any meal.
Mini Burgers
- Create mini burgers using grilled chicken or ground beef patties. Top with your favorite condiments and fresh veggies for a satisfying bite-sized treat.
Sliders with Pulled Chicken
- Use shredded chicken mixed with barbecue sauce for a sweet and tangy filling. Serve warm with coleslaw on top for added crunch.
Veggie Sliders
- Fill the buns with grilled vegetables like zucchini, bell peppers, and mushrooms. Add hummus or a creamy dressing for flavor-packed veggie sliders.
Breakfast Sliders
- Make breakfast sliders by filling the buns with scrambled eggs, cheese, and cooked turkey sausage. Perfect for brunch or a hearty breakfast option!
Snack Sliders
- Stuff the buns with deli meats like turkey or roast beef, cheese, and your choice of toppings. They make great finger foods for parties.
Sweet Treats
- Turn these slider buns into dessert by filling them with whipped cream and fresh fruits like strawberries or blueberries. A delightful twist to end your meal!
How to Perfect Homemade Slider Buns
Achieving the perfect homemade slider buns is easy if you follow these simple tips.
- Use room temperature ingredients: This helps the dough rise better and ensures even mixing.
- Knead thoroughly: Proper kneading develops gluten, giving your buns that desirable soft texture.
- Monitor water temperature: Using warm water (100–110°F / 38–43°C) activates the yeast effectively.
- Don’t rush the rising time: Allowing the dough to rise until doubled in size is crucial for light and airy buns.
- Brush with egg wash: This adds shine and color to your buns, making them visually appealing.
- Store properly: Keep leftover buns in an airtight container to maintain freshness.
Best Side Dishes for Homemade Slider Buns
Serving homemade slider buns is even more enjoyable when paired with complementary side dishes. Here are some great options:
- Sweet Potato Fries: Oven-baked sweet potato fries add a healthy crunch that pairs beautifully with sliders.
- Coleslaw: A refreshing coleslaw provides a crisp contrast to the softness of slider buns, enhancing every bite.
- Potato Salad: Creamy potato salad is a classic side that goes well with any type of slider you choose to serve.
- Grilled Corn on the Cob: Sweet corn brushed with butter makes for a delightful summer side that complements sliders perfectly.
- Mixed Green Salad: Lighten up your meal with a mixed green salad dressed in vinaigrette; it balances out heavier fillings.
- Chips and Salsa: Add some crunch with tortilla chips served alongside zesty salsa for dipping – fun and tasty!
Common Mistakes to Avoid
Making homemade slider buns can be a rewarding experience, but there are common mistakes that can hinder your success. Here are some tips to avoid them.
- Boldly skipping the rising time: Allowing the dough to rise is crucial for soft, fluffy buns. Don’t rush this step; it can take 1 to 1½ hours for the dough to double in size.
- Boldly neglecting the kneading: Failing to knead the dough properly will result in dense buns. Knead until the dough is smooth and stretchy, about 8–10 minutes with a mixer.
- Boldly using cold ingredients: Cold water or eggs can hinder yeast activation. Ensure your water is warm (100–110°F) and use room temperature eggs for best results.
- Boldly overcrowding the baking pan: If buns are too close together, they won’t rise properly during baking. Leave enough space between each bun on the tray.
- Boldly ignoring oven temperature: Baking at an incorrect temperature can lead to uneven cooking. Use an oven thermometer if necessary to ensure accuracy.
Refrigerator Storage
- Homemade slider buns can be stored in the refrigerator for up to 5 days.
- Store them in an airtight container or wrap them tightly in plastic wrap to maintain freshness.
Freezing Homemade Slider Buns
- You can freeze homemade slider buns for up to 3 months.
- Wrap each bun individually in plastic wrap and place them in a freezer-safe bag or container.
Reheating Homemade Slider Buns
- Oven: Preheat your oven to 350°F (175°C). Wrap buns in aluminum foil and heat for about 10-15 minutes until warmed through.
- Microwave: Place buns on a microwave-safe plate and cover with a damp paper towel. Heat in short bursts of 15 seconds until warm.
- Stovetop: Heat a skillet over low heat and add a bit of butter. Toast each side of the bun lightly until warmed.
Frequently Asked Questions
How do I make Homemade Slider Buns from scratch?
To make homemade slider buns, combine flour, yeast, sugar, salt, warm water, eggs, and butter. Knead until smooth, let rise, shape into balls, and bake!
Can I customize my Homemade Slider Buns?
Absolutely! You can add herbs, cheese, or spices into the dough for extra flavor. Experiment with toppings like sesame seeds or poppy seeds.
How long do Homemade Slider Buns last?
Homemade slider buns stay fresh for up to 5 days when stored in the refrigerator or up to 3 months if frozen properly.
What should I serve with Homemade Slider Buns?
These slider buns are perfect for mini sandwiches! Serve with grilled chicken, turkey patties, or vegetables for delicious meal options.
Conclusion
These homemade slider buns bring bakery-quality taste right into your kitchen. They’re beginner-friendly and versatile enough for any occasion—from weeknight dinners to game day feasts. Feel free to customize them with various toppings or mix-ins for your perfect sliders!

Homemade Slider Buns
- Total Time: 40 minutes
- Yield: Makes 8 slider buns 1x
Description
Homemade Slider Buns are a delightful addition to any meal, offering a soft and fluffy base for various fillings. Perfect for beginners, these buns elevate weeknight dinners, game day spreads, and casual gatherings with their warm aroma and golden hue.
Ingredients
- 3½ cups all-purpose flour
- 2¼ teaspoons RapidRise yeast
- 2 tablespoons granulated sugar
- 1 teaspoon table salt
- 1 cup warm water (100–110°F)
- 2 large eggs (room temperature)
- 3 tablespoons unsalted butter (softened)
- Sesame seeds (for topping)
Instructions
- Combine flour, yeast, sugar, and salt in a large bowl.
- Add warm water and one egg; mix until a shaggy dough forms.
- Knead in softened butter until smooth (8–10 minutes with mixer).
- Let the dough rise covered until doubled in size (1 to 1½ hours).
- Divide dough into eight pieces, shape into balls, and place on a lined baking pan.
- Allow buns to rise again until puffy (45 to 60 minutes).
- Brush tops with egg wash and sprinkle with sesame seeds.
- Preheat oven to 375°F and bake for 18–22 minutes until golden brown.
- Prep Time: 20 minutes
- Cook Time: 20 minutes
- Category: Bread
- Method: Baking
- Cuisine: American
Nutrition
- Serving Size: 1 serving
- Calories: 160
- Sugar: 1g
- Sodium: 150mg
- Fat: 4g
- Saturated Fat: 2g
- Unsaturated Fat: 2g
- Trans Fat: 0g
- Carbohydrates: 27g
- Fiber: 1g
- Protein: 5g
- Cholesterol: 40mg