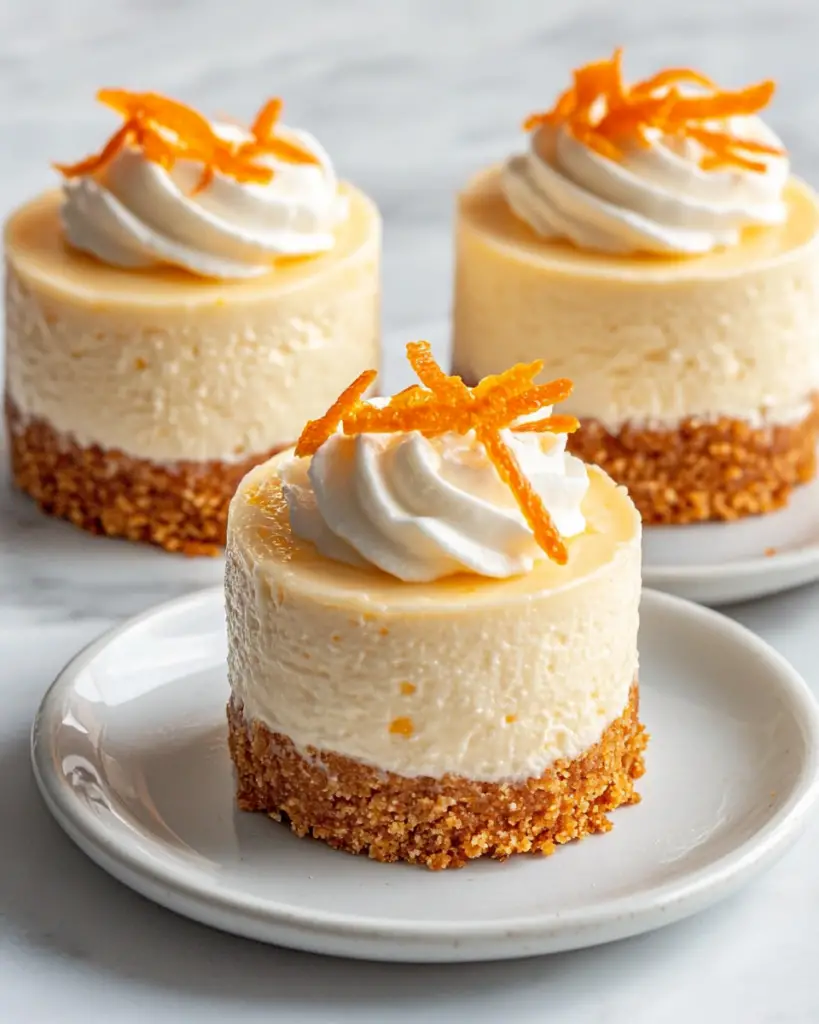
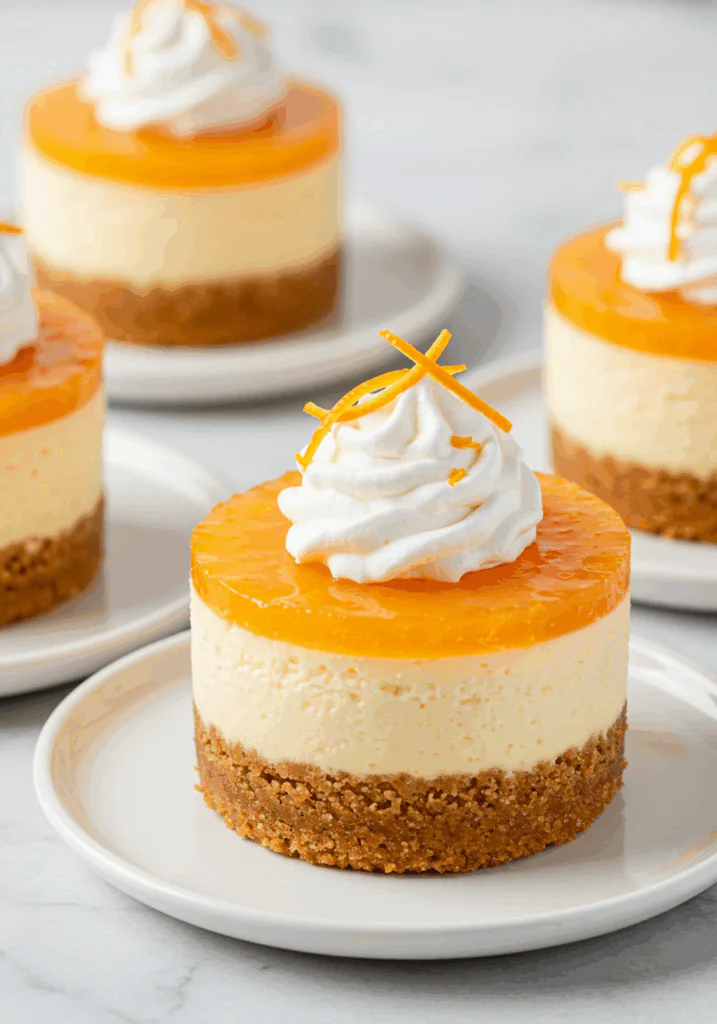
These Orange Creamsicle Mini Cheesecakes are a fun, refreshing twist on a classic dessert! With a buttery graham cracker crust, a creamy cheesecake filling, and a vibrant orange flavor, these mini treats are perfect for summer parties, holidays, or any time you’re craving something sweet and citrusy. These bite-sized delights come together easily and are sure to be a crowd favorite.
Subscribe to our newsletter for more sweet recipes delivered straight to your inbox!
Why You’ll Love These Orange Creamsicle Mini Cheesecakes
✔ Mini & Adorable – Perfectly portioned for a single serving. ✔ No-Bake – These cheesecakes are simple to make with no oven required. ✔ Tastes Like a Dream – The creamy orange flavor is light and refreshing. ✔ Perfect for Any Occasion – Great for parties, picnics, or a sweet treat after dinner.
Ingredients for Orange Creamsicle Mini Cheesecakes
- For the Crust:
- 1 ½ cups graham cracker crumbs – Sweet and buttery base.
- 4 tablespoons unsalted butter, melted – To hold the crust together.
- 2 tablespoons sugar – Sweetens the crust just enough.
- For the Cheesecake Filling:
- 2 cups cream cheese, softened – The creamy base for the filling.
- 1 cup powdered sugar – Sweetens the cheesecake filling.
- ½ cup heavy cream – For a rich and smooth texture.
- 1 tablespoon orange zest – Adds a burst of citrusy fragrance.
- ½ cup fresh orange juice – Gives the cheesecake that classic creamsicle flavor.
- 1 teaspoon vanilla extract – A touch of vanilla to enhance the flavor.
- For the Topping:
- ½ cup whipped cream – For a light and fluffy topping.
- 1 tablespoon orange zest – For extra citrus flavor and color.
Tools You’ll Need
- Muffin tin – To shape the mini cheesecakes.
- Paper cupcake liners – For easy removal of the cheesecakes.
- Mixing bowls – For mixing the crust and cheesecake filling.
- Electric mixer or whisk – To whip up the cheesecake filling.
- Spoon or piping bag – To top with whipped cream.
How to Make Orange Creamsicle Mini Cheesecakes
Step 1: Prepare the Crust
Line a muffin tin with cupcake liners.
In a medium bowl, combine the graham cracker crumbs, melted butter, and sugar. Stir until well mixed.
Press about 1 tablespoon of the crust mixture into the bottom of each cupcake liner. Use the back of a spoon to press it down firmly.
Chill in the fridge while you prepare the filling.
Step 2: Make the Cheesecake Filling
In a large mixing bowl, beat the softened cream cheese until smooth.
Add the powdered sugar, heavy cream, orange juice, orange zest, and vanilla extract. Continue beating until the mixture is smooth and fluffy.
If needed, scrape down the sides of the bowl to make sure everything is well combined.
Step 3: Assemble the Mini Cheesecakes
Spoon the cheesecake filling on top of the prepared crusts, filling each cup nearly to the top.
Smooth the tops with a spatula for an even finish.
Step 4: Chill
Refrigerate the mini cheesecakes for at least 3 hours or until fully set. If you’re short on time, you can chill them overnight.
Step 5: Top with Whipped Cream
Once the cheesecakes are set, top each one with a dollop of whipped cream.
Sprinkle with additional orange zest for a pop of color and citrusy flair.
Step 6: Serve & Enjoy!
Serve the cheesecakes chilled, and enjoy the creamy, citrusy goodness!
Serving Suggestions
- With Fresh Berries – Serve with fresh strawberries or raspberries for a colorful contrast.
- On a Dessert Platter – These mini cheesecakes look gorgeous as part of a dessert spread at parties.
- With a Glass of Iced Tea – A cool drink pairs perfectly with these refreshing desserts.
Tips for the Best Mini Cheesecakes
✔ Use Room Temperature Cream Cheese – For a smoother and creamier filling.
✔ Chill Well – Make sure to give these enough time to chill for the best texture.
✔ Customize the Topping – Add a drizzle of orange glaze or mini chocolate chips for a fun twist.
Storage Instructions
Refrigerator: Store leftovers in an airtight container for up to 3 days.
Freezer: These mini cheesecakes freeze well! Store in an airtight container for up to 1 month. Thaw in the fridge before serving.
Frequently Asked Questions (FAQ)
Q1: Can I make these ahead of time?
A: Yes! These mini cheesecakes are perfect for making ahead. Just chill them in the fridge until you’re ready to serve.
Q2: Can I use a different flavor of juice?
A: Absolutely! You can swap orange juice for lemon juice for a lemon creamsicle flavor.
Q3: Can I make these without a crust?
A: You can, but the crust adds a lovely crunch that complements the creamy filling. If you prefer to skip it, you can make a crustless version.
Conclusion: A Sweet, Refreshing Treat!
These Orange Creamsicle Mini Cheesecakes are the perfect balance of creamy, tangy, and sweet with a refreshing citrus twist. They’re easy to make, and everyone will love them. Whether you’re hosting a party or just treating yourself, these mini cheesecakes are sure to be a hit!
Did you make this recipe? Don’t forget to leave a review and share your photos on social media—we’d love to see your creations!
Preparation Time: 15 minutes
Chill Time: 3 hours
Cuisine: American
Nutritional Information (per mini cheesecake)
Calories: 220
Protein: 4g
Carbohydrates: 25g
Fat: 13g
Fiber: 1g
Enjoy these creamy, dreamy mini cheesecakes with every sweet bite!
Print
Orange Creamsicle Mini Cheesecakes
- Total Time: 3 hours 15 minutes
Description
These Orange Creamsicle Mini Cheesecakes are a fun, refreshing twist on a classic dessert! With a buttery graham cracker crust, a creamy cheesecake filling, and a vibrant orange flavor, these mini treats are perfect for summer parties, holidays, or any time you’re craving something sweet and citrusy. These bite-sized delights come together easily and are sure to be a crowd favorite.
Subscribe to our newsletter for more sweet recipes delivered straight to your inbox!
Ingredients
-
For the Crust:
- 1 ½ cups graham cracker crumbs – Sweet and buttery base.
- 4 tablespoons unsalted butter, melted – To hold the crust together.
- 2 tablespoons sugar – Sweetens the crust just enough.
-
For the Cheesecake Filling:
- 2 cups cream cheese, softened – The creamy base for the filling.
- 1 cup powdered sugar – Sweetens the cheesecake filling.
- ½ cup heavy cream – For a rich and smooth texture.
- 1 tablespoon orange zest – Adds a burst of citrusy fragrance.
- ½ cup fresh orange juice – Gives the cheesecake that classic creamsicle flavor.
- 1 teaspoon vanilla extract – A touch of vanilla to enhance the flavor.
-
For the Topping:
- ½ cup whipped cream – For a light and fluffy topping.
- 1 tablespoon orange zest – For extra citrus flavor and color.
Instructions
Step 1: Prepare the Crust
Line a muffin tin with cupcake liners.
In a medium bowl, combine the graham cracker crumbs, melted butter, and sugar. Stir until well mixed.
Press about 1 tablespoon of the crust mixture into the bottom of each cupcake liner. Use the back of a spoon to press it down firmly.
Chill in the fridge while you prepare the filling.
Step 2: Make the Cheesecake Filling
In a large mixing bowl, beat the softened cream cheese until smooth.
Add the powdered sugar, heavy cream, orange juice, orange zest, and vanilla extract. Continue beating until the mixture is smooth and fluffy.
If needed, scrape down the sides of the bowl to make sure everything is well combined.
Step 3: Assemble the Mini Cheesecakes
Spoon the cheesecake filling on top of the prepared crusts, filling each cup nearly to the top.
Smooth the tops with a spatula for an even finish.
Step 4: Chill
Refrigerate the mini cheesecakes for at least 3 hours or until fully set. If you’re short on time, you can chill them overnight.
Step 5: Top with Whipped Cream
Once the cheesecakes are set, top each one with a dollop of whipped cream.
Sprinkle with additional orange zest for a pop of color and citrusy flair.
Step 6: Serve & Enjoy!
Serve the cheesecakes chilled, and enjoy the creamy, citrusy goodness!
Notes
✔ Use Room Temperature Cream Cheese – For a smoother and creamier filling.
✔ Chill Well – Make sure to give these enough time to chill for the best texture.
✔ Customize the Topping – Add a drizzle of orange glaze or mini chocolate chips for a fun twist.
- Prep Time: 15 minutes
- Cook Time: 3 hours
- Cuisine: American