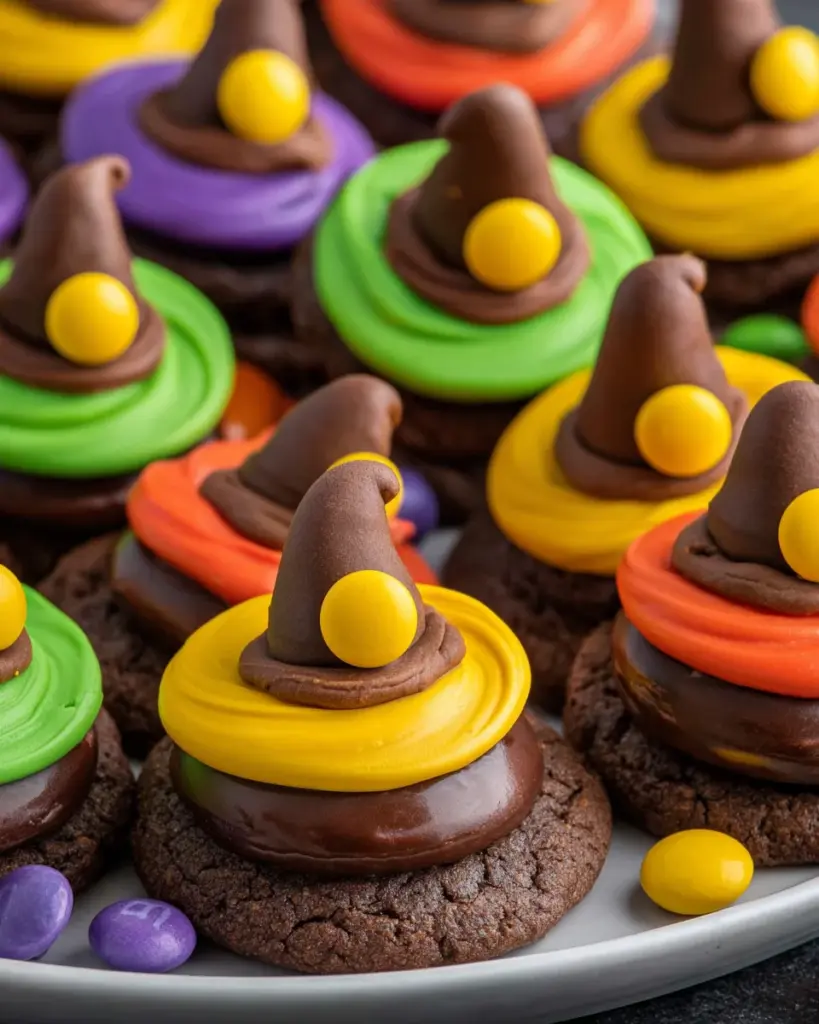
Witch Hat Cookies are a delightful and spooky treat perfect for Halloween celebrations. These no-bake cookies are not only fun to make but also serve as a creative activity for kids and adults alike. With their simple ingredients and whimsical design, Witch Hat Cookies can brighten up any festive gathering or Halloween party. Plus, they allow for personalization with various colors and decorations, making them a standout dessert that everyone will love.
Why You’ll Love This Recipe
- Easy to Make: With minimal preparation and no baking required, these cookies are perfect for a quick Halloween treat.
- Kid-Friendly: Involve the little ones in decorating; it’s a fun way to spend time together during the season.
- Customizable: Use different food coloring to create unique hats that match your Halloween theme.
- Deliciously Sweet: The combination of fudge-covered cookies, chocolate kisses, and frosting offers a delightful flavor experience.
- Perfect for Parties: Serve these cookies at your next Halloween gathering or treat bag; they’re sure to impress!
Tools and Preparation
Creating Witch Hat Cookies is straightforward with the right tools. Gather everything you need before you start to ensure a smooth process.
Essential Kitchen Tools
- Baking tray
- Small bowls
- Piping or sandwich bags
Why These Tools Matter
- Baking tray: Provides a stable surface for assembling your cookies.
- Small bowls: Ideal for mixing food coloring into the frosting without making a mess.
- Piping or sandwich bags: Make decorating easy by allowing precise application of frosting.
Ingredients
No bake Witch Hat Cookies are a cute, edible Halloween craft to make with kids.
For the Cookies
- 1 packet fudge-covered cookies
- 16 ounce tub of white frosting
- Food coloring
- 18 Chocolate kisses (unwrapped)
- 18 Mini yellow M&Ms
How to Make Witch Hat Cookies
Step 1: Arrange the Cookies
Arrange the fudge-covered cookies in a single layer on a baking tray. This will be the base of your witch hats.
Step 2: Color the Frosting
Divide the white frosting into small bowls, one for each color you plan to use. Add food coloring to each bowl until you achieve your desired shades.
Step 3: Prepare the Frosting Bags
Scoop each colored frosting into piping or sandwich bags. Cut off the corner of each bag to create a small opening for easy decorating.
Step 4: Create the Hats
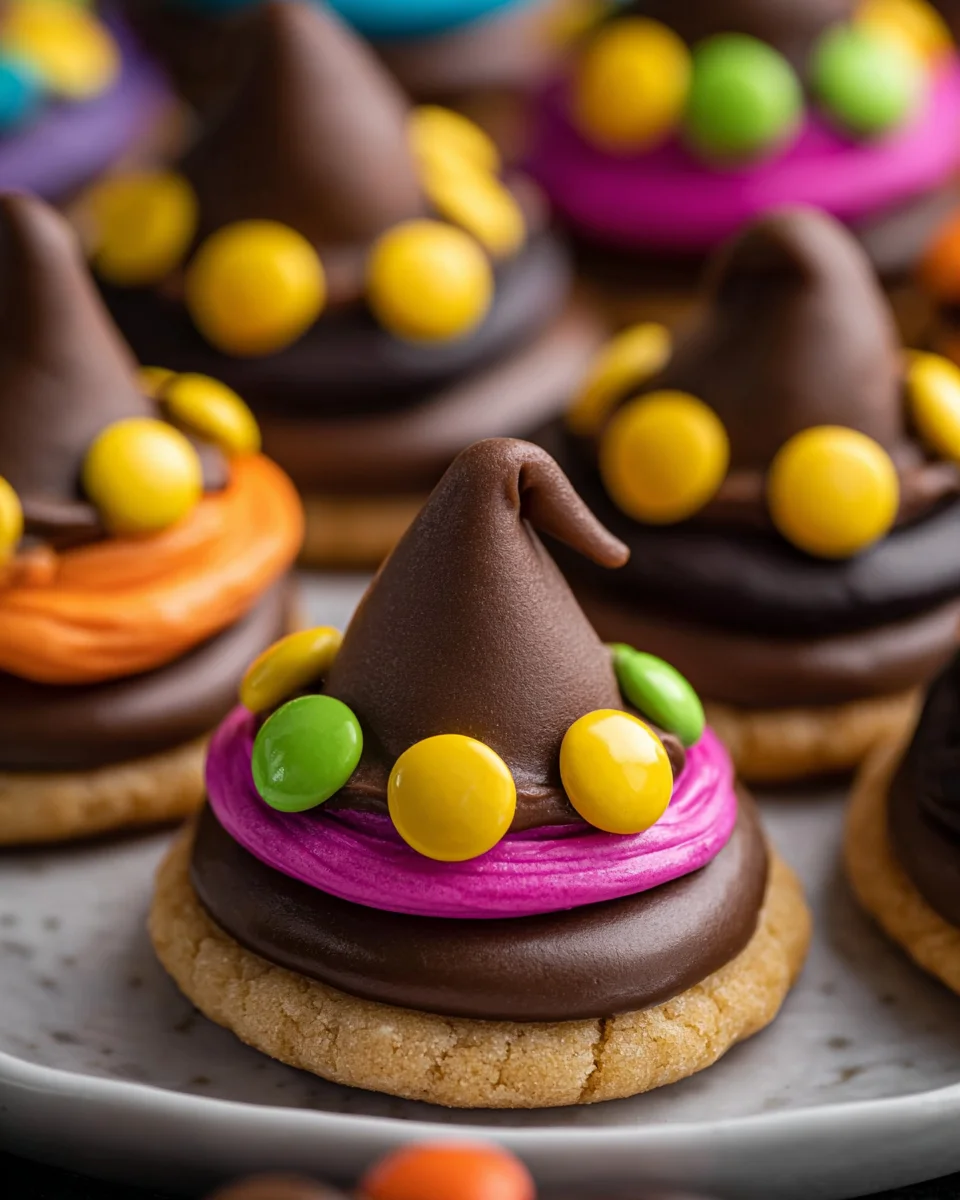
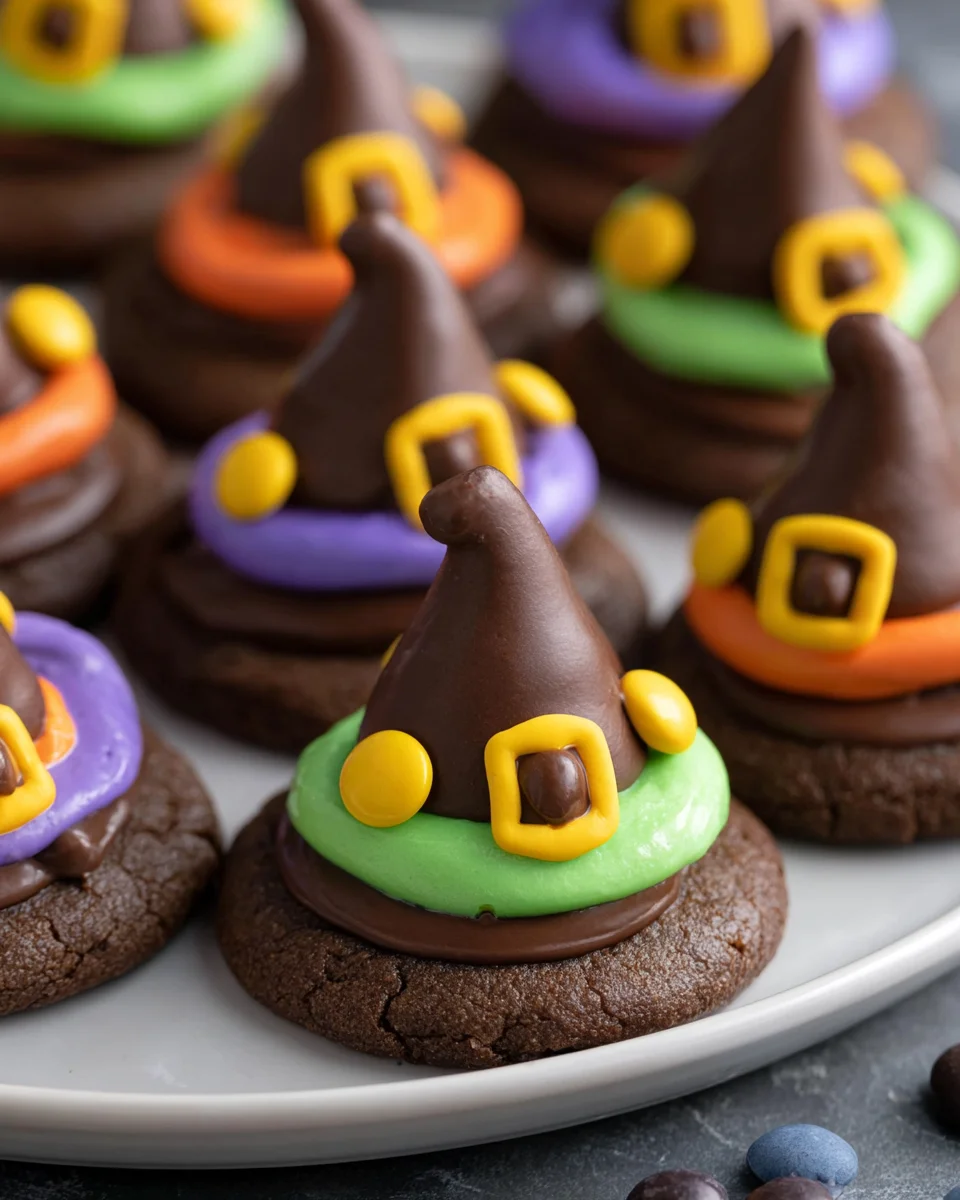
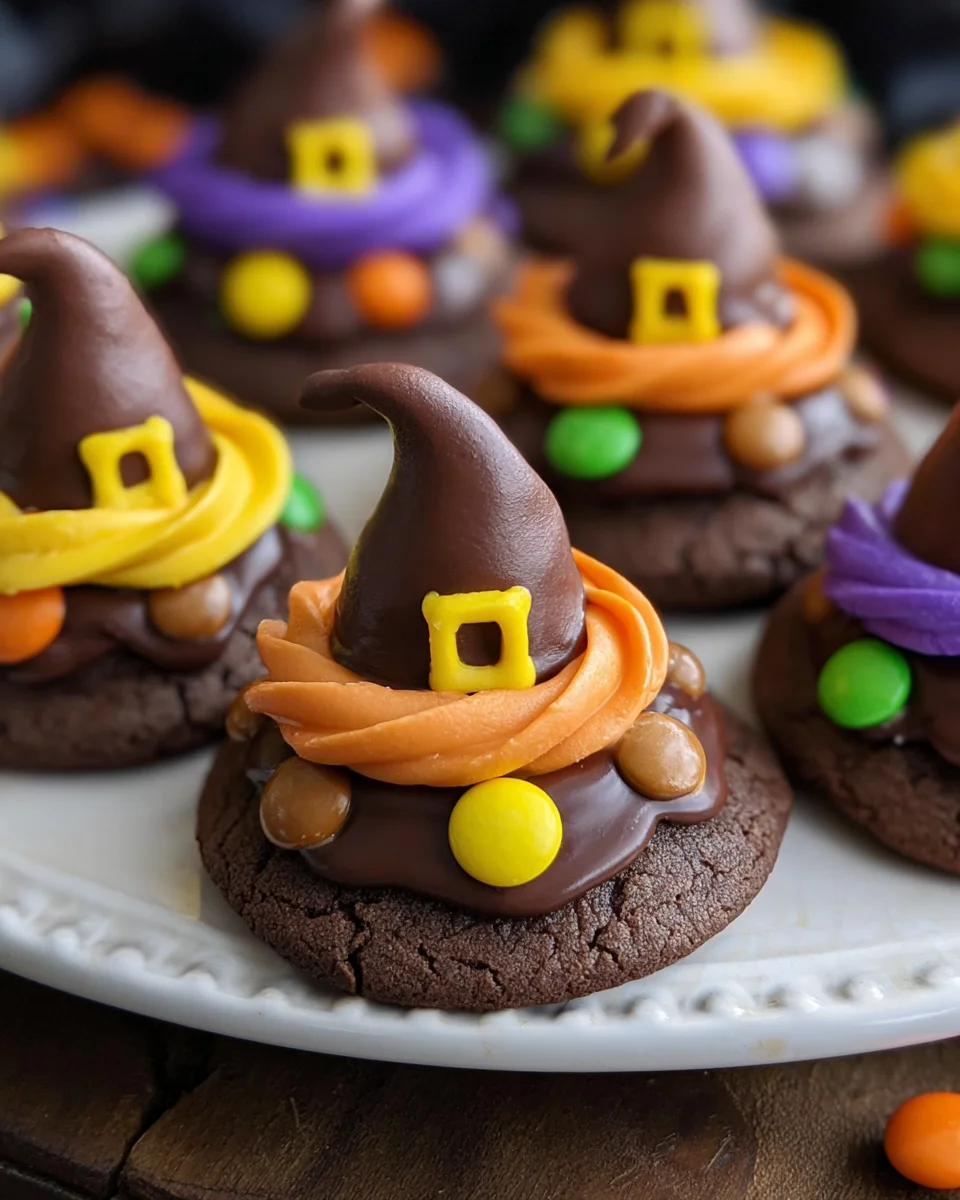
Place a dollop of frosting about the size of a chocolate kiss in the center of each cookie. Then, press one chocolate kiss down into the center of the frosting. This will form the top of your witch hat while creating an attractive ring of colored frosting around it.
Step 5: Add Buckles
Top each cookie with one mini yellow M&M placed on the band of frosting. This gives your witch hats their signature buckle look.
Step 6: Set and Enjoy
Allow the frosting on your Witch Hat Cookies to set for about 15-20 minutes before indulging in these spooky treats!
How to Serve Witch Hat Cookies
Witch Hat Cookies are not only a delightful treat but also a fun and festive addition to any Halloween gathering. Here are some creative serving suggestions to make your cookies stand out.
For Halloween Parties
- Cookie Platter: Arrange the Witch Hat Cookies on a colorful platter surrounded by other Halloween-themed treats for an eye-catching display.
- Cupcake Stand: Use a tiered cupcake stand to showcase the cookies, elevating their presentation and making them the center of attention.
As Party Favors
- Individual Bags: Place each cookie in a small clear bag tied with orange or black ribbon, making for adorable party favors that guests can take home.
- Creative Labels: Add personalized labels to each bag with spooky messages or your name, enhancing the festive spirit.
With Hot Chocolate
- Dunking Delight: Serve the cookies alongside warm cups of hot chocolate. The combination of flavors is perfect for chilly nights and adds a cozy touch.
At School Events
- Classroom Treats: Bring Witch Hat Cookies to school events or bake sales. They’re easy to transport and sure to be a hit with kids and parents alike.
How to Perfect Witch Hat Cookies
To make your Witch Hat Cookies even more festive and fun, consider these simple tips that will enhance both their appearance and taste.
- Bold Colors: Use vibrant food coloring in your frosting to create eye-catching hats that appeal to kids.
- Chill Before Serving: Allow the cookies to chill for a bit after frosting so that everything sets nicely, preventing any mess when handling.
- Experiment with Designs: Try different shapes or patterns with the frosting. Swirls and sprinkles can add an extra touch of creativity.
- Stay Fresh: Keep leftover cookies in an airtight container at room temperature for up to a week; this helps maintain their freshness.
- Mix Up Flavors: Consider adding a hint of vanilla or almond extract to the frosting for added flavor depth.
- Use Different Bases: While fudge-covered cookies are great, experimenting with other types of cookies like chocolate cream or vanilla can yield exciting results.
Best Side Dishes for Witch Hat Cookies
These Witch Hat Cookies pair well with several side dishes that complement their festive charm. Here are some ideas:
- Pumpkin Spice Muffins: Soft and moist muffins infused with pumpkin spice flavors make a perfect autumnal side.
- Apple Slices with Caramel Dip: Crisp apple slices served with creamy caramel dip provide a refreshing contrast.
- Cheese Platter: A selection of cheeses paired with crackers adds sophistication and balances sweetness.
- Veggie Tray with Hummus: Fresh vegetables served with hummus offer a crunchy, healthy option alongside sweet treats.
- Halloween Fruit Salad: A mix of seasonal fruits like oranges, grapes, and pomegranate seeds creates a colorful salad fitting for the holiday.
- Spooky Popcorn Mix: Combine popcorn with candy corn and chocolate pieces for a sweet snack that’s fun to eat.
Common Mistakes to Avoid
Making Witch Hat Cookies can be fun, but there are a few common mistakes to watch out for.
- Bold frosting preparation: Failing to properly color the frosting can result in dull-looking hats. Always mix your food coloring well before using it.
- Bold cookie arrangement: Not arranging the cookies in a single layer can make decorating challenging. Ensure each cookie has ample space on the tray.
- Bold frosting consistency: Using frosting that is too runny will cause it to spread uncontrollably. Aim for a thicker consistency for better shape retention.
- Bold timing issues: Forgetting to let the frosting set can lead to messy cookies. Allow at least 15-20 minutes for the frosting to harden before serving.
- Bold spacing with M&Ms: Skipping or overcrowding the M&M decoration can ruin the look of your cookies. Place each candy thoughtfully on the frosting band.
Refrigerator Storage
- Store Witch Hat Cookies in an airtight container.
- They can stay fresh in the refrigerator for up to 1 week.
- Layer parchment paper between cookies to prevent sticking.
Freezing Witch Hat Cookies
- You can freeze these cookies for up to 2 months.
- Use a freezer-safe container or wrap them tightly in plastic wrap.
- Thaw them in the refrigerator overnight before serving.
Reheating Witch Hat Cookies
- Bold oven method: Preheat your oven to 300°F (150°C) and warm cookies for about 5 minutes, ensuring they stay soft.
- Bold microwave method: Heat one cookie at a time for 10-15 seconds until slightly warm; don’t overheat as this may melt the chocolate kiss.
- Bold stovetop method: Place cookies in a covered pan over low heat for 2-3 minutes, checking frequently to avoid melting.
Frequently Asked Questions
What are Witch Hat Cookies?
Witch Hat Cookies are fun, no-bake treats made from fudge-covered cookies topped with chocolate kisses and colorful frosting, perfect for Halloween celebrations.
How long do Witch Hat Cookies take to prepare?
These delightful cookies take about 15 minutes to prepare and an additional 15-20 minutes for the frosting to set, making them quick and easy.
Can I customize my Witch Hat Cookies?
Absolutely! You can use different colors of frosting or even sprinkle edible glitter on top for an added festive touch.
How should I store leftover Witch Hat Cookies?
Store any leftover cookies in an airtight container in the refrigerator for up to one week or freeze them for up to two months.
Conclusion
Witch Hat Cookies are not only adorable but also versatile treats that you can customize for any occasion. With their easy preparation, they make a great activity for kids and adults alike. Try experimenting with different colors and toppings to create your unique version of these festive delights!

Witch Hat Cookies
- Total Time: 15 minutes
- Yield: Makes 18 cookies 1x
Description
Witch Hat Cookies are a delightful and whimsical treat perfect for Halloween gatherings. These no-bake cookies are not only easy to make but also provide an engaging activity for both kids and adults. With just a few simple ingredients, you can create these spooky snacks that are sure to impress your guests. Decorate them with various colors and toppings to match your Halloween theme, making each cookie unique. Whether you’re hosting a party or looking for a fun dessert option, these Witch Hat Cookies will add a festive touch to any celebration.
Ingredients
- 1 packet fudge-covered cookies
- 16 ounce tub of white frosting
- Food coloring (varied colors)
- 18 chocolate kisses (unwrapped)
- 18 mini yellow M&Ms
Instructions
- Arrange the fudge-covered cookies in a single layer on a baking tray.
- Divide the white frosting into small bowls and mix in food coloring to achieve desired shades.
- Scoop each colored frosting into piping or sandwich bags, cutting off the corner for easy decorating.
- Place a dollop of frosting in the center of each cookie, then press one chocolate kiss down into it.
- Top with one mini yellow M&M on the frosting band for a cute buckle effect.
- Let the frosting set for about 15-20 minutes before serving.
- Prep Time: 15 minutes
- Cook Time: 0 minutes
- Category: Dessert
- Method: No Bake
- Cuisine: American
Nutrition
- Serving Size: 1 serving
- Calories: 150
- Sugar: 14g
- Sodium: 65mg
- Fat: 7g
- Saturated Fat: 3g
- Unsaturated Fat: 4g
- Trans Fat: 0g
- Carbohydrates: 21g
- Fiber: 0g
- Protein: 1g
- Cholesterol: 0mg